- Database
- Zones
- Destiny of Velious
- Forgotten Pools
Forgotten Pools
| Level | 85 - 90 |
|---|---|
| Type | Instanced Indoor |
| Expansion | Destiny of Velious |

|
|
|||||||||||||||||||||
|
|||||||||||||||||||||
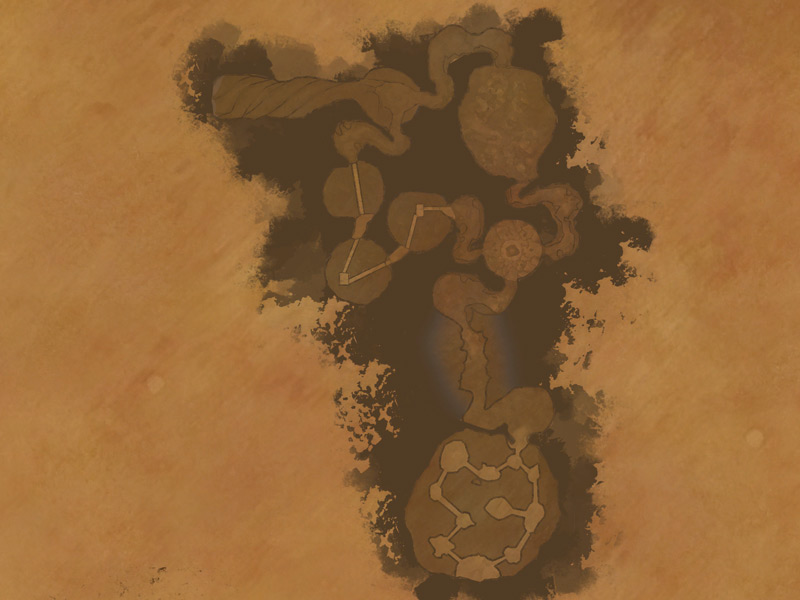
The first of three dungeons in Velketor's Labyrinth. This was the laboratory and home of Velketor's giant, taken over by Kraytoc and the Order of Rime.
Accessed by climbing down a ladder at 367,-339,1077 inside a cave in Storm Gorge in the Great Divide.
Slaying Lord Doljonijiarnimorinar within this zone will open up access to Hold of Rime: The Ascent.
When you first enter, you'll find Bergna Veliumsmiter offering Primal Velium Shard missions, so chat with her before you proceed. In this sickly cavern, you'll need to clear out all of the hostile creatures before mounting the tallest of the mud pillars to face Aeri'Ondi the Infectious. If you don't he'll call everything you avoided into the fight to assist him. Be aware as you fight, and drag him and yourself out of the green clouds he creates. Once he falls, you'll be able to pass deeper into the Pools. Note that there's an acid-burned chest sunk into the water's edge here. When you find the key, you'll be able to open it for a Primal Velium Shard.
| Contents [hide] |
Infectious Mire
There's nothing more than killing in this area. As you enter various sections of the Forgotten Pools, you may be assaulted by a Tortured Coldain, so be ready.
The Pool's Crown
The same as above applies here.
Hall of Remembrance
As you enter, you'll find Terig the Lost pacing the circle before you. There's nothing for this area but to proceed eastward to The Shapery.
The Shapery
You'll see Styrax Fluorescene and his pet Anthocyanin wandering about this area, but at the start they're not interested in fighting. This place exerts a strange force on its occupants. Whenever you step off the path under the red plants, you'll be infused with Nature's Rage, a buff that inflicts minor damage and buffs combat stats. Stepping back on the path or moving to the blue plants causes the rage to subside. Striking down all of the keepers in the grove will awaken Styrax, making him and Anthocyanin attackable. While you're fighting, watch for color shifts in Anthocyanin. When he shifts to red, move him and Styrax over to the blue side, or you'll find them nearly impossible to damage. When he shifts to blue, move under the red plants. Killing Anthocyanin first eliminates having to follow this mechanic, but will drive Styrax into a rage so be ready for him to toughen up when his buddy dies. Also, near the north door, behind a rock on the red side, seek out a tiny kybur and kill it to get an acid-burned key. Recall that the chest is found near the entrance where you fought Aeri'Ondi the Infectious.
The Nursery Drapes
You'll notice a huge egg when you enter, but stepping into the room will awaken Gerg Teae, who will coil around the egg to guard it. As you fight, Gerg will sometimes disappear under the ground and pop back up. He'll also throw his target into the tunnel outside the room, where you may find yourself immobilized by "a tightening grasp". It's not a mob but you can target it. The person affected will need to have groupmates or a mercenary kill the grasp off to get free, and it will continue reattaching itself as long as the victim is near a wall. Once the worm dies, you'll see a Nesting Ice Griffin in the room. Clicking it will cause you to mount up and fly to the feet of Lord Doljonijiarnimorinar. You'll land very close to him, and he's aggressive, but apparently he's also very nearsighted because he won't notice you until you strike him. Take care not to fall of the pillars as you fight. Once he dies, you have twenty minutes to contain his soul permanently, so hustle the rest of the zone! Get back on the Ice Griffin (again, don't fall since the drop is lethal and you'll have to fight "Lord Bob" again) and return to the Nursery Drapes. Follow the tunnel south, until you reach Olmek's arches.
Olmek's Arches
Once you enter the area, and fight a few kobolds, you'll encounter a Living Wall. As with the tightening grasps, it's not a creature but you can attack it. Behind it, you'll find a larger, greener version of the same, but with a twist. You'll need to touch the two orbs beside it, which will give you a set of debuffs that seriously hampers your fighting ability. If you're in a group, you should figure out who can best take the hit without wrecking your party. Continue following the catwalks until you encounter Olmek of the Living Stone, which is another one of the walls. He's much more durable than the rest, and as you fight waves of kobolds will join the fray, so warm up your crowd control or area effect attacks. Once through Olmek, you'll find yourself back in the Hall of Remembrance, and if you won through quickly, you can drop what's left of Lord Doljonijiarnimorinar here and get your reward. If you weren't fast enough, you can return to the Nursery Drapes, hitch another griffin ride, and fight him again for another chance to win the race against time.
|